Want a quick, natural way to boost your glow without spending a lot on skincare products? This guide will show you how to make a homemade honey face mask in just a few minutes using simple ingredients you may already have at home.
Honey is loved in skincare because it helps your skin feel soft, smooth, and refreshed, making it a great choice for both beginners and DIY beauty lovers.
In this easy tutorial, you’ll learn the best type of honey to use, step-by-step instructions, and custom honey mask recipes for dry, oily, sensitive, or dull skin plus safety tips for the best results.
Why Honey Is Great for Your Skin
Honey is one of the most popular natural skincare ingredients and for good reason. It’s simple, affordable, and works well for many skin types. When used in a face mask, honey can help your skin feel softer, smoother, and more refreshed.
Key Benefits of Honey for Your Face
1. Helps Hydrate and Moisturize
Honey is a natural humectant, which means it helps attract and hold moisture. This can make your skin feel plump and hydrated, especially if you have dry or dull skin.
2. Gives a Natural Glow
A honey face mask can leave your skin looking brighter and healthier, making it a great option when your skin feels tired or rough.
3. Helps Soothe the Skin
Honey has calming properties that may help reduce the look of irritation and make skin feel more comfortable, especially after a long day or harsh weather.
4. Supports Clear-Looking Skin
Many people use honey masks to help keep skin looking clean and balanced, which is helpful for oily or acne-prone skin types.
Best Type of Honey to Use (Raw vs Regular)
Raw Honey (Best Choice)
- Less processed
- Often thicker and richer
- Great for DIY skincare masks
Regular Honey (Still Works)
- Easier to find in stores
- Works fine for basic hydration and softness
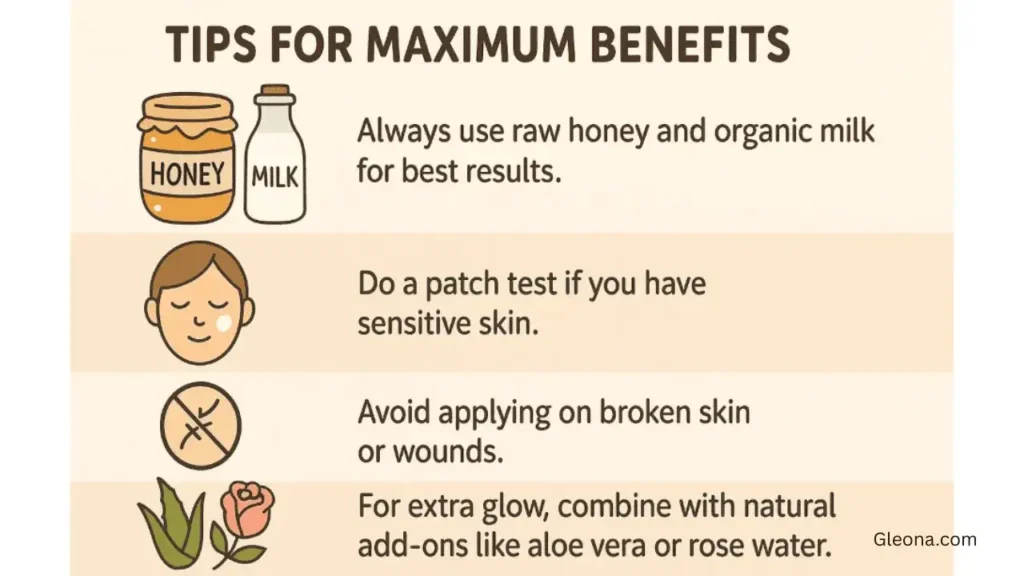
Tip: Choose pure honey with no added flavors or sugar for the best results.
What You Need to Make a Homemade Honey Face Mask

Making a homemade honey face mask is simple, affordable, and beginner-friendly. You only need one main ingredient to start, and you can customize it with a few optional add-ins based on your skin type and skincare goal.
Basic Ingredient (Simple Recipe)
1 tablespoon of honey
- Raw honey is preferred, but regular honey also works.
- Choose pure honey with no added sugar, flavors, or syrups for best results.
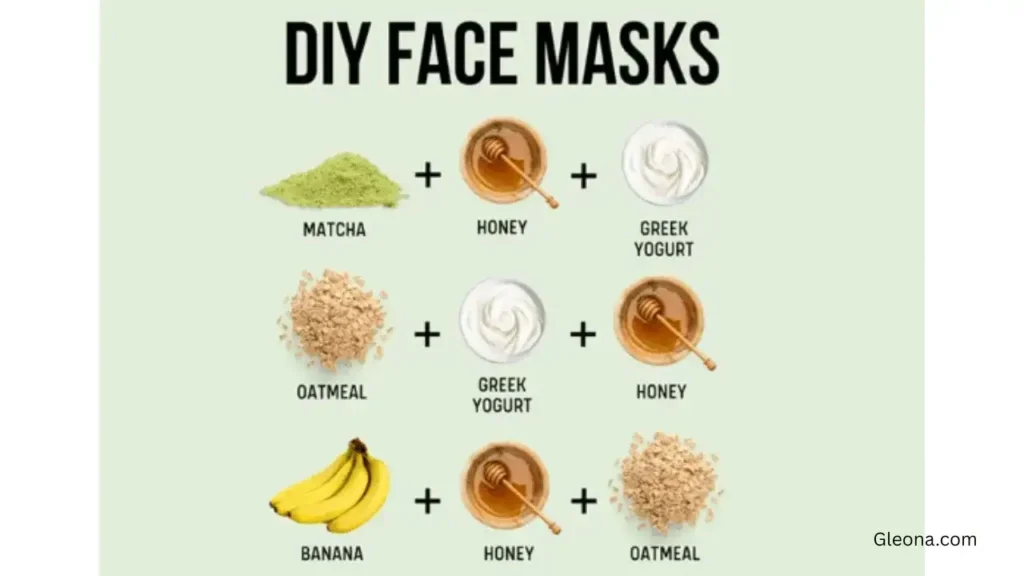
Optional Add-Ins (Choose Based on Your Skin Goal)
You can mix honey with one of these ingredients to target different skincare needs:
Yogurt (For softer, smoother-looking skin)
- Helps skin feel more refreshed and moisturized.
- A good option for dry or dull skin.
Oatmeal (Gentle and soothing)
- Helps calm the skin and adds mild exfoliation.
- Works well for sensitive or oily skin types.
Aloe Vera Gel (Cooling and hydrating)
- Helps skin feel light and comfortable.
- Ideal for sensitive skin or skin that feels irritated.
Turmeric (For a glow boost)
- Can help brighten the appearance of the skin.
- Use only a small pinch to reduce the risk of staining.
Lemon (Use with caution)
- Some people use lemon for a brighter-looking appearance, but it can irritate the skin.
- Not recommended for sensitive, dry, or easily irritated skin.
How to Make a Homemade Honey Face Mask (Step-by-Step Tutorial)
This homemade honey face mask is quick, simple, and beginner-friendly. You can make it in just a few minutes using ingredients you may already have at home.
Step 1: Cleanse Your Face First
Start with a clean face so the mask can work better.
- Wash your face with a gentle cleanser to remove makeup, sunscreen, oil, and dirt.
- Pat your skin dry with a clean towel (avoid rubbing).
Step 2: Mix Your Honey Face Mask
Prepare the mask in a small clean bowl.
- Add 1 tablespoon of honey to the bowl.
- If you want to customize it, mix in one optional ingredient:
- Yogurt for extra softness and hydration
- Oatmeal for gentle soothing and mild exfoliation
- Aloe vera gel for a cooling, calming feel
Stir until the mixture looks smooth and easy to spread.
Step 3: Apply the Mask Evenly
Apply a thin, even layer to your face.
- Use clean fingers or a brush to spread the mask gently.
- Avoid the eye area and lips.
- Focus on areas that feel dry, rough, or dull.
Step 4: Leave It On for the Right Amount of Time
Let the mask sit on your skin without overdoing it.
- Leave it on for 10 to 15 minutes.
- Try not to let it dry out completely, especially if your skin is sensitive.
Step 5: Rinse Off Gently
Remove the mask carefully to avoid irritating the skin.
- Rinse with lukewarm water.
- Use gentle circular motions if needed, but do not scrub.
- Pat your face dry with a clean towel.
Step 6: Moisturize After the Mask
Finish with a moisturizer to lock in hydration.
- Apply a lightweight moisturizer or a hydrating cream.
- If it’s daytime, follow with sunscreen.
Best Homemade Honey Face Mask Recipes for Different Skin Types
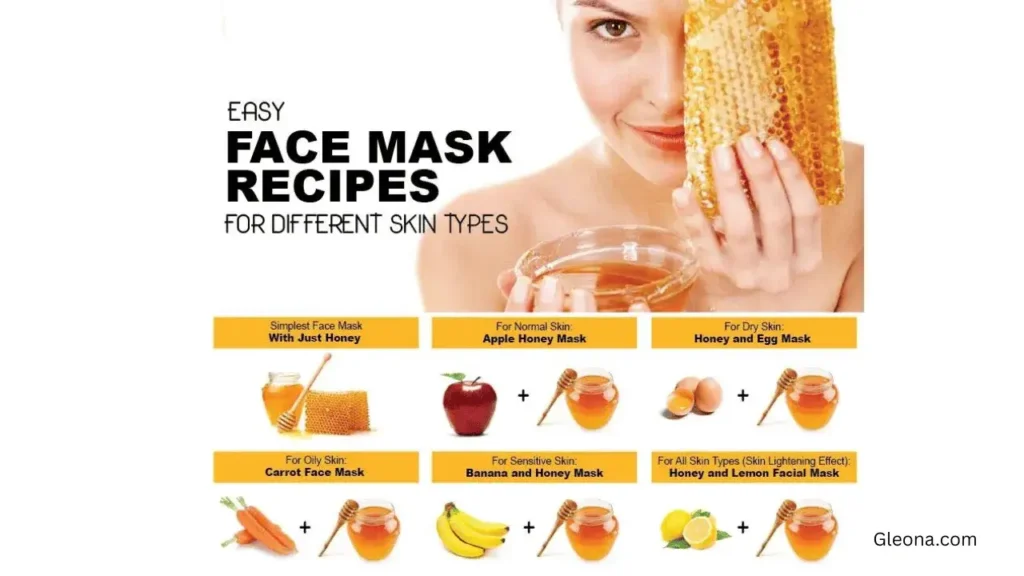
One of the best things about a homemade honey face mask is how easy it is to customize. By adding one or two simple ingredients, you can create a mask that matches your skin type and helps you get better results.
For Dry Skin (Extra Hydration)
Best recipe: Honey + Yogurt
- Ingredients:
- 1 tablespoon honey
- 1 teaspoon plain yogurt
- Why it works: Helps skin feel softer, smoother, and more moisturized.
- How to use: Apply for 10–15 minutes, then rinse with lukewarm water.
Alternative option: Honey + Aloe Vera
- Ingredients:
- 1 tablespoon honey
- 1 teaspoon aloe vera gel
- Best for: Dry skin that also feels irritated or tight.
For Oily or Acne-Prone Skin (Balanced and Clear-Looking)
Best recipe: Honey + Oatmeal
- Ingredients:
- 1 tablespoon honey
- 1 teaspoon finely ground oatmeal
- Why it works: Oatmeal feels calming and provides gentle exfoliation without being harsh.
- How to use: Leave on for 10 minutes, then rinse gently.
Tip: Avoid adding heavy oils if your skin gets oily easily.
For Sensitive Skin (Gentle and Soothing)
Best recipe: Honey Only (Simple and Mild)
- Ingredients:
- 1 tablespoon honey
- Why it works: A basic honey mask is often the gentlest option and reduces the risk of irritation.
- How to use: Apply a thin layer for 8–12 minutes, then rinse carefully.
Alternative option: Honey + Aloe Vera
- Helps skin feel cooler and more comfortable.
Important: Always patch test first if you have sensitive skin.
For Dull Skin (Glow-Boosting)
Best recipe: Honey + Yogurt + Turmeric (Small amount)
- Ingredients:
- 1 tablespoon honey
- 1 teaspoon plain yogurt
- A tiny pinch of turmeric
- Why it works: This combo helps improve the look of dullness and supports a brighter-looking glow.
- How to use: Leave on for 8–10 minutes and rinse well.
Caution: Turmeric can stain light towels or clothing, so use a dark towel when rinsing.
How Often Should You Use a Honey Face Mask?

A honey face mask is gentle enough for most people, but using it too often can sometimes cause dryness or irritation especially if you add extra ingredients like turmeric or lemon. For best results, it’s smarter to use it consistently in a simple routine.
Recommended Weekly Schedule (By Skin Type)
Normal skin
- Use a honey face mask 1–2 times per week
- Helps maintain softness and a healthy-looking glow
Dry skin
- Use 2 times per week
- Stick to hydrating combinations like honey + yogurt or honey + aloe vera
Oily or acne-prone skin
- Use 1–2 times per week
- A good option is honey + oatmeal for a balanced feel
Sensitive skin
- Use 1 time per week
- Choose the simplest recipe (honey only or honey + aloe vera)
Combination skin
- Use 1–2 times per week
- Focus on gentle hydration without heavy add-ins
When to Use It (Best Time of Day)
- Evening is ideal, because your skin can rest afterward
- If you use it in the morning, always follow with moisturizer and sunscreen
Signs You May Be Using It Too Often
Reduce the frequency if you notice:
- Redness or itching
- Dry patches or tightness
- Burning or stinging during application
- Skin feeling overly sensitive afterward
If any irritation happens, stop using the mask and switch back to a basic routine until your skin feels normal again.
Tip for Best Results
Consistency matters more than frequency. Using a honey face mask once or twice a week regularly is usually enough to keep skin looking smooth and refreshed.
Honey Face Mask Tips for Better Results
A homemade honey face mask is already simple and effective, but a few small changes can help you get better results and avoid common mistakes. Use these tips to make your mask work more smoothly and feel more comfortable on your skin.
Start With Clean Skin
Always apply the honey mask to freshly cleansed skin.
- Remove makeup, sunscreen, and excess oil first
- This helps the mask sit evenly and feel more effective
Use a Thin, Even Layer
More honey does not mean better results.
- A thin layer is easier to apply and rinse off
- Thick layers can feel sticky and messy without adding extra benefits
Warm the Honey Slightly (Optional)
If your honey is thick, you can warm it slightly to improve texture.
- Place the honey container in warm water for a minute
- Do not overheat it
- Avoid using very hot honey on your face
Avoid the Eye Area and Lips
Honey can feel uncomfortable if it gets too close to sensitive areas.
- Keep the mask away from the eyes, eyelids, and lips
- Focus on cheeks, forehead, chin, and jawline
Don’t Leave It On Too Long
Keeping a honey mask on longer than recommended may cause irritation for some skin types.
- 10–15 minutes is enough for most people
- If you have sensitive skin, 8–12 minutes may be better
Rinse With Lukewarm Water
Hot water can dry out the skin and cause redness.
- Use lukewarm water and gentle movements
- Do not scrub or rub harshly
- Pat dry with a clean towel
Moisturize Right After
Moisturizing after the mask helps lock in hydration.
- Use a lightweight moisturizer for oily skin
- Use a richer moisturizer for dry skin
- If it’s daytime, apply sunscreen afterward
Keep the Recipe Simple
Too many add-ins can increase the chance of irritation.
- Use honey alone if your skin is sensitive
- Add only one extra ingredient at a time when testing new combinations
Use Fresh Mixtures Each Time
Homemade masks are best when made fresh.
- Mix only what you need for one use
- Avoid storing leftover mixtures for later
Safety Tips + Who Should Avoid Honey Face Masks
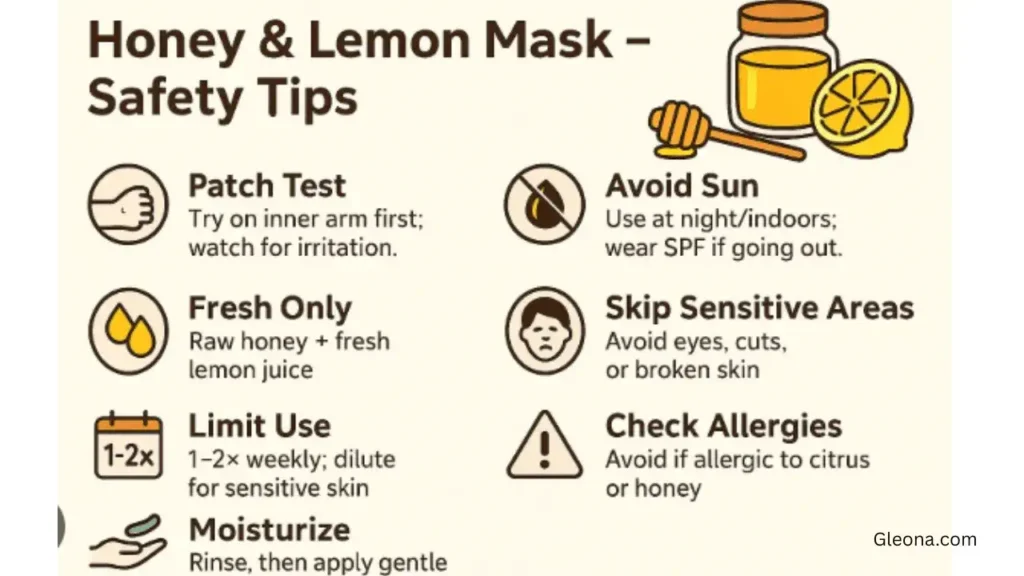
Homemade honey face masks are usually gentle, but every skin type is different. Following basic safety steps helps you avoid irritation and get the best results, especially if you have sensitive skin.
Do a Patch Test First
Before applying any new face mask, test it on a small area of skin.
- Apply a small amount behind your ear or on your jawline
- Leave it on for 10 minutes, then rinse
- Wait a few hours (or up to 24 hours if your skin is very sensitive)
- If you notice redness, itching, burning, or swelling, do not use it on your face
Avoid Honey Masks If You Have Honey or Bee Allergies
Do not use a honey face mask if you are allergic to:
- Honey
- Bee pollen
- Propolis
- Other bee-related products
Stop immediately if you feel stinging, itching, or discomfort.
Be Careful With Strong Add-Ins
Some ingredients can increase irritation, even when mixed with honey.
Lemon (Not recommended for sensitive skin)
- Can cause stinging, dryness, or irritation
- May increase sun sensitivity
- Avoid if your skin is dry, sensitive, or easily irritated
Turmeric (Use only a tiny amount)
- Can stain skin, towels, and clothing
- May irritate very sensitive skin if used too often
- Always use a small pinch and rinse thoroughly
Essential oils (Best avoided)
- Can trigger irritation or allergic reactions
- Not recommended for beginners or sensitive skin types
Avoid Using the Mask on Broken or Irritated Skin
Do not apply a honey face mask if you have:
- Open cuts or wounds
- Active rashes
- Sunburn
- Severe irritation or peeling
- Recent chemical peel or strong exfoliation
Wait until your skin fully calms down before applying any mask.
Watch for Signs of Irritation
Remove the mask and rinse immediately if you notice:
- Burning or stinging
- Itching that gets worse
- Redness spreading
- Swelling or hives
After rinsing, apply a gentle moisturizer and avoid other active products for the day.
Who Should Avoid Honey Face Masks?
A honey face mask may not be the best option if you:
- Have a known allergy to honey or bee products
- Have extremely reactive or allergy-prone skin
- Are currently using strong acne treatments and your skin is peeling or irritated
- Have a skin condition that flares easily (it’s best to check with a dermatologist)
Homemade Honey Face Mask vs Store-Bought Masks

When it comes to skin care, both homemade honey face masks and store‑bought masks have their places. Choosing the right option depends on your needs, preferences, and skin goals. Here’s a clear comparison to help you decide which might be best for you.
What Makes a Homemade Honey Face Mask Different?
Pros
- Simple Ingredients: You know exactly what’s in it just honey and optional natural add‑ins.
- Affordable: Most ingredients are inexpensive and easy to find at home or in stores.
- Customizable: You can adjust the recipe based on your skin type or goals.
- Gentle on Skin: Great for sensitive skin when kept simple.
Cons
- Less Potent: It may not deliver strong results for specific concerns like deep acne or hyperpigmentation.
- Short Shelf Life: Best used fresh each time.
- Time Needed: You must make it each time you want to use it.
What About Store‑Bought Face Masks?
Pros
- Targeted Formulas: Many products are developed for specific concerns, such as acne, anti‑aging, hydration, or exfoliation.
- Scientifically Tested: Many brands test ingredients for safety and performance.
- Convenient: Ready to use without preparation.
- Longer Shelf Life: Often sealed and preserved for months.
Cons
- More Ingredients: Some formulas include synthetic chemicals, fragrances, or preservatives that can irritate sensitive skin.
- Cost: Higher price compared with DIY masks.
- Less Customization: You can’t tailor the mask exactly to your preference.
When to Choose a Homemade Honey Face Mask
A DIY honey mask is ideal if you:
- Prefer natural, clean skincare
- Want an affordable option
- Have sensitive or dry skin
- Are looking for a gentle hydration boost
- Enjoy simple, at‑home routines
When a Store‑Bought Mask Might Be Better
Consider store‑bought masks if you:
- Are targeting a specific skin concern like deep acne, wrinkles, or dark spots
- Want a product backed by clinical testing
- Prefer convenience over preparation
- Like products with multiple active ingredients
Final Comparison at a Glance
| Feature | Homemade Honey Mask | Store‑Bought Mask |
|---|---|---|
| Cost | Low | Medium–High |
| Ingredients | Simple & natural | Can be complex |
| Customization | Easy | Limited |
| Potency | Gentle | Can be strong |
| Convenience | Needs prep | Ready to use |
Quick Tip
You don’t have to choose one forever. A balanced skincare routine can include both natural masks like your homemade honey mask and targeted store‑bought products, depending on your goals and how your skin feels.
Best Honey Brands to Consider
1. Nature Nate’s 100% Pure Raw & Unfiltered Honey
- A widely available and trusted honey brand in the USA known for raw quality and smooth flavor.
- Great choice for DIY beauty recipes and everyday use.
2. Nature Nate’s Organic Raw Honey
- USDA Organic certified, raw and unfiltered.
- Mild flavor and easy to use in skincare masks or food.
3. Y.S. Eco Bee Farms Raw Honey
- Certified organic raw honey with a rich, creamy texture.
- Works well for face masks and natural skincare.
4. Wholesome Sweeteners Organic Raw Honey
- Fair Trade and USDA Organic, pesticide‑free.
- Good option for those who prefer organic products.
- Organic and Grade A honey sourced from floral blossoms.
- Known for clean pure flavor and versatility.
6. Cox’s Honey 100% Pure Raw & Unfiltered Honey
- Authentic raw honey from U.S. beekeepers.
- Mild and classic honey flavor, suitable for DIY beauty and culinary uses.
7. Desert Creek Raw & Unfiltered Honey
- Raw Texas wildflower honey with bold natural sweetness.
- Great for natural skin recipes and nutrition.
8. Wedderspoon Manuka Honey (premium)
- A well‑known Manuka honey brand with antibacterial properties (not strictly raw but high quality).
- Good for boosting skincare benefits if you want something more potent.
Conclusion
Making a homemade honey face mask is a simple, natural, and affordable way to nourish your skin, add hydration, and boost your natural glow. With just honey and a few optional ingredients like yogurt, aloe vera, or oatmeal, you can create a mask tailored to your skin type whether dry, oily, sensitive, or dull.
Honey masks are gentle, easy to prepare, and a great addition to your weekly skincare routine. Remember to patch test first, use fresh ingredients, and follow the recommended usage schedule to avoid irritation.
Take Action:
- Try your first honey mask tonight and see how your skin feels afterward.
- Share your favorite honey mask combination in the comments.
- For more DIY skincare tips and recipes, subscribe to our blog and stay updated on natural beauty solutions!
For more Skin Care Tips and Tricks, Please visit gleona.com.
FAQ How to Make a Homemade Honey Face Mask
1: Can I use honey on my face every day?
No. While honey is gentle, using it daily may cause irritation or dryness for some skin types. 1–2 times per week is usually sufficient for hydration and glow.
2: How long should I leave a honey face mask on?
Leave the mask on for 10–15 minutes. For sensitive skin, 8–12 minutes is safer. Avoid leaving it on too long to prevent stickiness or irritation.
3: Can I use regular honey instead of raw honey?
Yes, regular honey works, but raw honey is preferred because it retains natural enzymes, nutrients, and antibacterial properties that benefit the skin.
4: Should I moisturize after using a honey face mask?
Yes. Applying a moisturizer after rinsing helps lock in hydration and keeps your skin soft and smooth. If using the mask in the morning, follow with sunscreen.
5: Are honey masks safe for sensitive skin?
Generally, yes if you use pure honey or a simple mix like honey + aloe vera. Always perform a patch test first, and avoid strong add-ins like lemon or turmeric if your skin is very reactive.